Master AWS RDS: The Ultimate Guide to Launching Your Own Cloud Database in Minutes
Boost Your Productivity and Scale Your Business with Expert Tips and Best Practices for RDS Instance Setup and Management


Table of contents
That's a lot of acronyms :)
- AWS stands for Amazon Web Services the popular cloud service provider by amazon, and RDS stands for Relational Database Service.
Steps to create an RDS instance on AWS
- In this tutorial, we are gonna create a Postgres database instance in the Dev/test template.
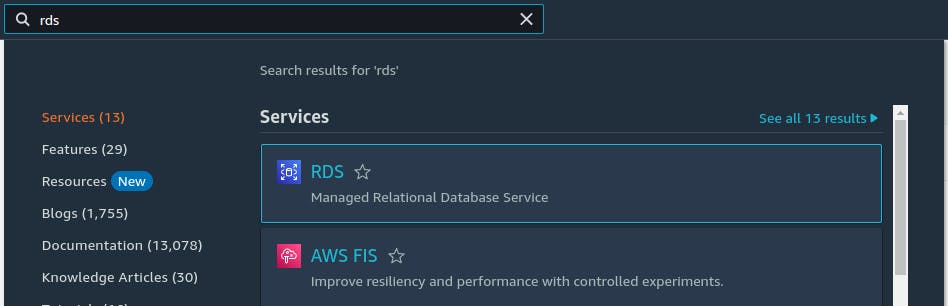
First login to AWS Management Console and search for RDS and click on the first result
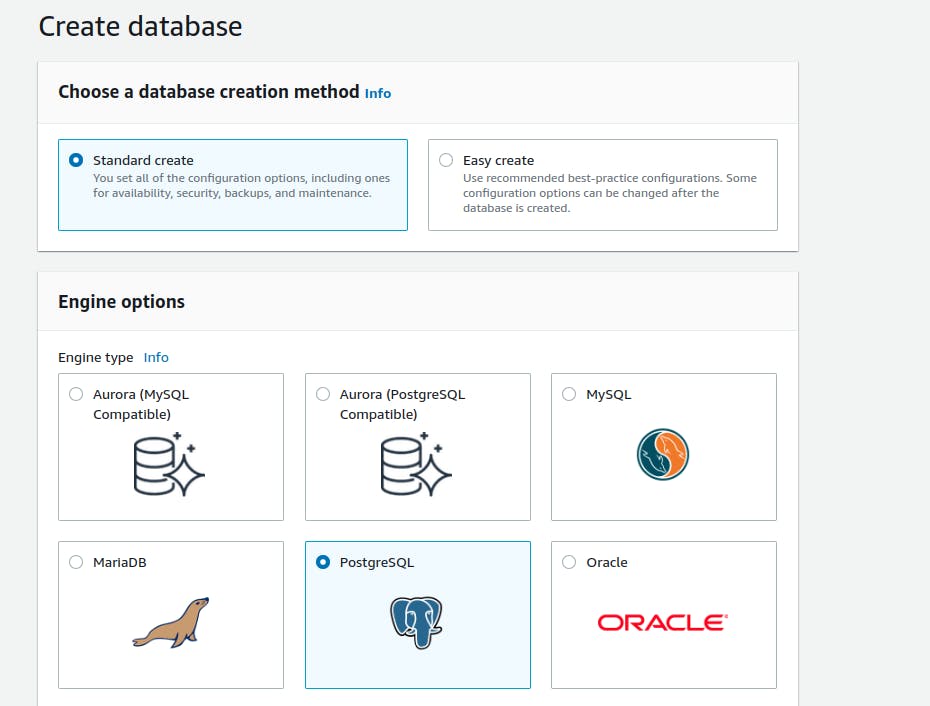
Next click on create a database and it'll open the creation page where you can see a list of available database services by was. As for now, we'll select the PostgreSQL database. Select Dev/test in templates as this allow us to make more custom configurations.
Availability and durability
There are three different types of instances to be chosen.
A Multi-AZ Cluster (new) will have two readable standby DB instances with each in a different Availability Zones (AZ).
A Multi-AZ Cluster will have a primary DB instance and a standby DB instance with each in a different Availability Zones (AZ). But the standby instance doesn't support connections for reading workflows
Single DB Instance will have a single instance with no extra standby (selecting this for this tutorial)
Settings

Fill out all the necessary fields as per your requirement. The DB Instance identifier is the name you see in the DB instances list of your AWS account
- Instance configuration and Storage
select the DB Instance class, and make sure you select one as per your requirement and usage of your DB instance. Each class is allotted a different CPU size ram and network speeds.
Considering our tutorial I'm selecting standard classes.
Leave the default values in the storage section as the values mentioned there are more than enough for our use case.
- Connectivity
You can leave the defaults. If needed create a Virtual Private Cloud for yourself and assign it to the instance so that only you can access the instance even though your password got leaked.
Use the default subnet group. Give public access as YES. If given No, only users under the assigned VPC can access the instance. If given YES, anyone with a DB password can have access to it.
Choose Availability Zone which is near to you, or you can set it as no preference.
By default, the instance will have port 5432. If you would like to change that, go to the additional configuration at the end of the connectivity section and give it a port you like

- Additional Configuration
Many will try to care about this section but this is as important as giving a password to your instance.
Initial database name - we need to give our database a name to connect to it. Please do mind that this has nothing to do with your instance identifier name.
Now choose backup and encryption settings as per your requirements.
Congratulations you have finished configuring, now click on create database button at the end and wait for it to be available in the next 5 minutes
When the instance is available you can see its details below.

Steps to connect to your database from a DBMS tool.
HOST - This is the value of the Endpoint field in the above details as shown in the image
PORT - 5432 by default, unless changed while creating the database
DATABASE NAME - You can find this value under the DB name field in the Configuration tab.
Username and password are as set by you when creating the database
"With AWS RDS, you don't have to worry about the hassle of managing your own databases. Let AWS handle the heavy lifting so you can focus on what matters most - growing your business. Get started with AWS RDS today and experience the benefits of cloud computing firsthand